Those who know me know that I'm constantly working to better organize the stuff in our Adventure Rig. The available space is quite small, so it needs to be used efficiently. I've spent years refining how stuff gets stored in the van, replacing a "good" container with a "great" container whenever I can pick up a few more cubic inches of utilized volume or something that makes using the system just that little bit easier.
My "chuckbox" is a prime example. It is under constant revision; each time I can find (or eventually learn to make) a better item that helps me to efficiently store and use the items within, it changes. It's a dense enough topic that it has its own post, and a second follow-up.
 |
| Kitchen circa 11/2016 - I've already changed some things since. |
Note: This post contains Amazon affiliate links. See sidebar for more information.
In a similar vein, I've spent a lot of time refining how I store and transport all of my "Dry Goods" - the food and ingredients that don't need to be kept in the fridge during a trip. For reasons of versatility, I've organized the back of the van around removable containers, rather than drawers or other built-in systems. At least once a month, I need to remove the bed platform and all the boxes so I can use the back of the van for large-sized cargo. As such, for Dry Goods and other gear, I've used a variety of off-the-shelf storage totes.
 |
| (original bed/platform shown) |
These have the advantage of being rugged, lightweight, and inexpensive. The negative is that with all the canned goods, chips, bread, and whatever else all stored in a single big tub, delicate things can get mangled, and I was often left digging for small items that tended to migrate to the bottom of the box.
The interim solution, which has served us for about three years, was to cut up some cardboard to create a"six-pack" insert for the bin that helped divide up the space a little bit. Four bits of cardboard, cut with interlocking slots and sized to "friction fit" to the tub worked remarkably well. This was cheap and easy, but had the one disadvantage of not being reconfigurable. Making a new insert only took a few minutes, but was just enough work that I only did so a few times, when the need was really pressing. Skipping ahead a bit, here you can see the last "six-pack" insert, and its replacement solution:

The new insert is "Coroplast" or Corrugated Plastic Sheet, aka "that stuff they use to make the signs you see on the side of the road". Some Overlanders or photographers will look at the above photo and immediately see that I was inspired by "TrekPak" inserts - a clever product that supplies various precut (or bulk) chunks of padded dividers that can be reconfigured with a set of pins.
TrekPak is good stuff - I've seen a lot of people use it both for camera gear and for general drawer organization, etc. It is lightweight, and the padded dividers are stiff enough to keep things in place, but soft enough that you can store lenses, etc. within without additional padding. The pins make it very quick and easy to move dividers around so that nothing moves. The main problem with TrekPak is that it's spendy. Precut "kits" sized for a given popular case (like Pelican, SKB, etc.) range widely from small boxes to the larger cases, but even small ones are expensive. You can also go "bulk" and just buy sheets of material in various heights and cut it yourself which will save a few bucks, but even then it can be expensive and they don't offer sheets quite as large as I would have needed for this job. The "deepest" bulk divider material they sell is 8.5" tall. These that I've made are a bit taller, and I might have gone as deep as 11".
The good news is that even a brief inspection of photos of TrekPak will reveal that it's basically made by laminating thin sheets of EVA (craft) foam to Coroplast, both of which are available very inexpensively, especially if you're planning to buy in bulk.
Working with the Coroplast is very simple. It cuts with a standard box-knife or hobby cutter. Since you want all the corrugations to run up/down, the simplest approach is just to just cross-cut your entire sheet to the depth of the dividers you're making (e.g. 9" for my tote), then cut parallel to the corrugations to get the length you need for each individual divider.
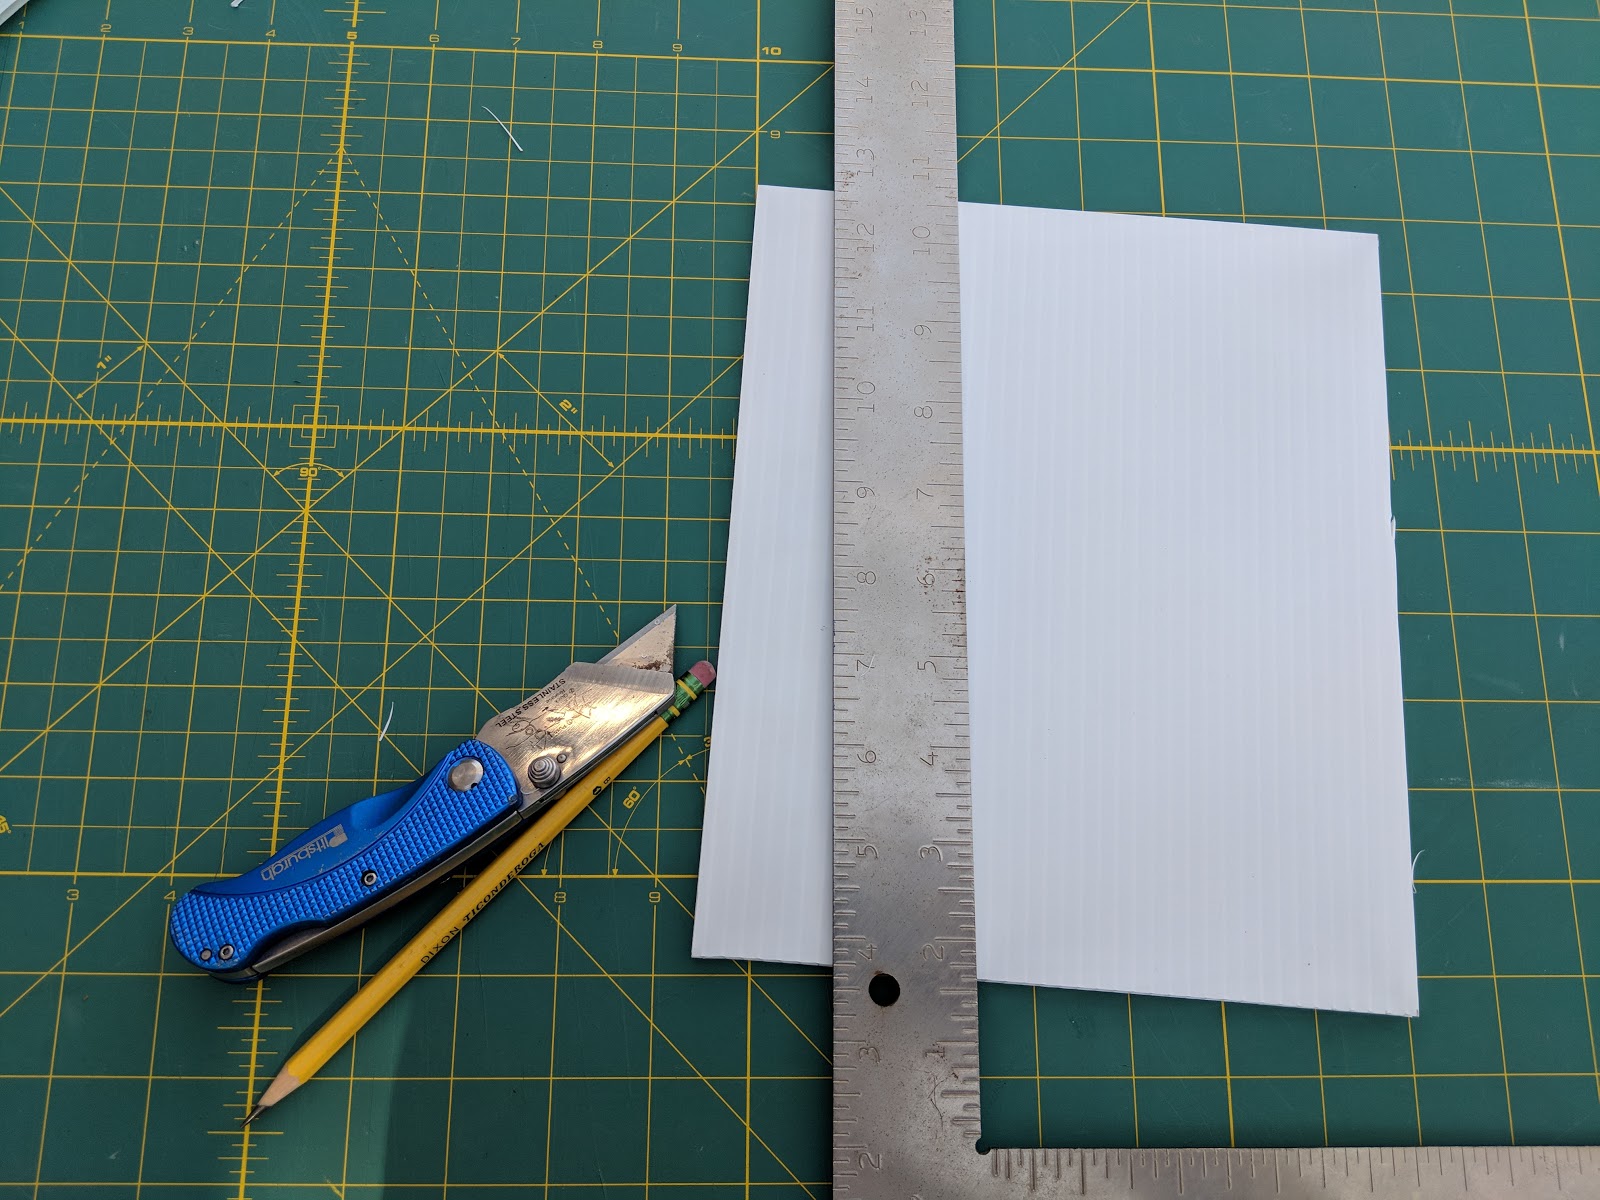
For my Dry Goods box, the work was only slightly complicated by the fact that the Sterilite 15gallon totes, I'm currently using has slightly tapered sides. This meant that most of the pieces weren't pure rectangles, but careful measurements and a straightedge yielded great results.

 |
| Chips unbroken, bread unsquashed |
As a substitute for the name-brand TrekPak Pins, I used landscape staples meant for affixing sod or weed-control fabric. In bulk, these offer quite the savings! The staples worked pretty well, but I've also since found 1/4" Irrigation Tubing Stakes that are an even closer match to the TrekPak stuff and similarly inexpensive when bought in quantity. Since the food doesn't need the same level of protection as camera gear, I omitted the foam for this part of the project.
However, since I started with a 36" x 72" sheet of Coroplast and the dry-goods box used less than half of that, I went ahead and started on doing a foam-backed set of dividers for a recently-scored surplus Pelican 1450 case that I want to use for camera equipment.

I pre-cut all the plastic and then laminated them to pieces of 2mm EVA foam using 3m Super77 spray adhesive. I cut widths of foam slightly over-sized and then trimmed to size after lamination. I did it this way partially because I didn't feel the need to put foam on the "outside" face of the outer-edge dividers, and because I didn't want to waste foam with a lot of off-cuts. For ease-of-lamination, next time I might just do up a bunch of large sheets and cut them to length after the fact. I'm sure cutting the full sandwich of foam and plastic will require a bit more effort, but it shouldn't be too much trouble.
 |
| Friction-fit only while I wait for my irrigation staples |
Once cut and laminated to the foam, these inserts have the same stiffness as all the TrekPak I've handled, and I feel plenty confident storing my lenses, etc. within.
Thoughts and Tips:
- EVA or Craft foam is readily available in dozens of colors as flat sheets up to about 12" square, or in 36" x 60" rolls (black or white only, so far as I've seen) from your local hobby/craft stores
- Corrugated Plastic is available in sizes all the way up to 4'x'8' sheets, and gets dramatically cheaper per square-inch as you go up.
- White and Clear Coroplast seems to be the cheapest and most readily available at the big-box hardware stores, but all-black sheets are also available in 2'x3' sizes for the more looks-conscious among us. Or, just start collecting all the old campaign and real-estate signs you see on the side of the road...
- For best results with 3M Super77 adhesive, apply to both surfaces and then wait until they are just tacky to the touch, then join. (In other words, use as you would contact adhesive.)
- The first batch of Landscape Staples I found at my local store were bare steel, with only a little oil applied. I cleaned them and hit with a coat of primer, but I made sure to just order galvanized staples for the 2nd purchase. For the ultimate budget-DIY approach, just cut 6" lengths of coat-hanger-wire and bend them in half...
- With respect to the depth of the inserts:
- On my food box I intentionally left the inserts about 2" short of the top of the tub - this lets me store wide/flat items like a pack of tortillas on "top" of the organizer instead of having to carve out a wide section or trying to store them on their side.
- For the Camera/Pelican box, I cut the outer pieces to the full-depth of the box, then friction-fit the foam bottom in-between. All of the inner dividers are about 1/2" shorter since they sit on top of the foam bottom. This gave me a tighter fit within the box versus trying to have the outer pieces also sit on top of the foam.
Parts Breakdown:
- 36" x 72" x 5/32" sheet corrugated plastic
- 36" x 60" x 2mm roll EVA foam
- Landscape Staples, (20 used for food box)
- Galvanized Irrigation stakes, (22 used for Pelican case)
- 3M Super 77 Adhesive (1 can)
So, for about 3/4 the cost of a pre-fabbed TrekPak kit for the Pelican 1450 alone, I had enough material to create inserts for a small Pelican case, a large storage tote, and a significant amount of material left over. I'd guess I have enough foam and coroplast for at least another small or medium Pelican case.
UPDATE:
So far, my DIY organizers are working great. I've taken the Camera/Pelican box on many trips and I feel pretty good about how secure everything is inside.
I've also used some of the surplus corrugated plastic to add a set of dividers to our new "coffee kit":

I am big into "kitting" as a process, whenever possible. The idea is to have everything you need for a task, especially an oft-repeated task, close at hand so that the task can be as smooth and efficient as possible. I do this even at home. After the 4th or 5th time I had to dig into a drawer to find the coffee scoop, or fetch the filters from the pantry, I reorganized a tiny corner of the kitchen into "kit" form and now the scoop hangs on the side of the drip machine and the filters, coffee, grinder, etc. are all co-located and easy to fetch one handed, even bleary-eyed on a Sunday morning.
In the chuckbox post, you can see an early revision of the coffee kit was stored in the chuckbox. This worked great on the days when I was camping with and using the chuckbox, but when I'm solo camping, or when the weather was bad, I prefer to have the option of making the first cup without having to open the van door!

This meant either moving the coffee gear to my solo (smaller-sized) kitchen box or fetching the coffee gear out of the big chuckbox in bad weather. Pass. Instead, I've relocated all the coffee gear (now including a 40oz carafe of water that can double as a thermos) into a repurposed plastic file box.

As a bonus, this has freed up almost a cubic foot inside the Chuck Box which lets me re-fit the Sterilite drawer system I had used previously, so I have better organization of the "small stuff" in the box:

UPDATE 2:
I have continued using this method, including sourcing Coroplast by recycling road-side signage in my most recent chuckbox update.
This comment has been removed by the author.
ReplyDeleteNice! Exactly what I was looking for
ReplyDelete