
Monday, June 25, 2018
Quarter-Window Utility Rack
A quick update, now that I've finished the build on my utility rack that spans the rear quarter window between the C and D pillars on the driver's side. Like many of my projects, this starts with inspiration provided by the wonderfully rich aftermarket available to the Volkswagen crowd, which I then shamelessly copy and duplicate DIY-fashion for the Astro van and its (non-existent) aftermarket. In this case, I took inspiration from the Campervan Culture "Side Mount System".


Sunday, May 20, 2018
Roof Rack Improvements
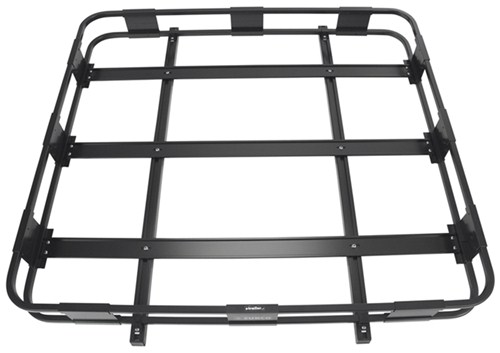
It seems that one of the universal farkles of any overland vehicle is a stout roof rack - usually overloaded with Jerry cans of fuel, dented aluminum cases, and tools. Clearly, in building an Overlander out of an Astro van, I've eschewed some of the more de rigueur "fashions" of overlanding, but let's face it, a roof rack is just so damned useful..
Friday, January 26, 2018
Chuckbox 101
So after my last post about organizing my food box, in which I referenced the Chuckbox, I got some questions about the box itself, and figured I was due to write that up as well.
Trying to describe our portable camp-kitchen is a bit like trying to hit a moving target - it's constantly changing, and it packs in a lot of functions.

Trying to describe our portable camp-kitchen is a bit like trying to hit a moving target - it's constantly changing, and it packs in a lot of functions.

Monday, January 22, 2018
Overland Organization (aka DIY TrekPak inserts)
Those who know me know that I'm constantly working to better organize the stuff in our Adventure Rig. The available space is quite small, so it needs to be used efficiently. I've spent years refining how stuff gets stored in the van, replacing a "good" container with a "great" container whenever I can pick up a few more cubic inches of utilized volume or something that makes using the system just that little bit easier.
My "chuckbox" is a prime example. It is under constant revision; each time I can find (or eventually learn to make) a better item that helps me to efficiently store and use the items within, it changes. It's a dense enough topic that it has its own post, and a second follow-up.
 |
| Kitchen circa 11/2016 - I've already changed some things since. |
Thursday, January 4, 2018
2017, In Summary
Well, we're about a week into 2018 and I'm just getting serious about finishing a writeup for 2017. That's just about right, I guess. 2017 was the year of feeling very much on the back-foot much of the time for us. Not that this is a complaint - being on the back foot at least means you're still in the fight, right? And more importantly, things have felt hectic mostly because we've been busy doing a lot of worthwhile stuff.
2017 was definitely a year chock-full of travel!

Monday, November 20, 2017
On Board Air, Part 1
So we spend a lot of our time in the van out in the desert. A lot of those trails have pretty badly washboarded roads, and I know that the best way to smooth those over is to air-down my tires. Yet sometimes, I don't. I just grit my teeth and listen to everything rattle. Why? Because I dread the hassle of airing back up. It's not that it takes that long, but the whole process of fetching the portable compressor out of the back box, popping the hood to connect the battery clamps, airing up, and then reversing the process just to try to deal with a too-hot-to-touch compressor does make me think twice before grabbing the deflators. And that's dumb.
Ergo, time to simplify that as much as possible. Hard-mounting the compressor and an air tank under the van won't shorten the actual time to re-inflate by very much (though having a bit of reserve in the tank should help a bit). The biggest motivator here is just to have everything "ready to use" as much as possible. Connect the coiled hose to an outlet on either side, and start the air. When complete, disconnect and stow the hose, and off I go.
To that end, I did my usual "slow burn" on this project. I spent a few months gathering datasheets and crawling around the van with a measuring tape. A few months back, I picked up a hard-mount version of my Viair 400-series compressor from a friend at a swap-meet. Next I scored a nice air tank off eBay for about half of normal price. Today's project is to get ready to mount the tank.
 After a lot of lying under the van, I chose this spot - this is the recess under the body behind (inboard) of the entry step. It's long and skinny, and just about tailor-made for the Viair 2.5gallon tank. Towards the top-end of the photo you can see two captured nuts in the body "frame rail". Not sure if these serve a purpose on older or 2WD vans, but on mine they're un-used, so I took them over for my purposes. I happened to have the right metric thread bolts in my collection of things I've removed from the van over time. Towards the bottom of the photo (forward end of the frame rail) you can see that I added a pair of riv-nuts for a second bracket.
 I used some 2" angle iron for the body-side, and 1.5" angle on the tank-feet, with 1" square tube connecting them. You can see from how the mount sits on the tank that just about half of the tank will fit up inside that space. If I could have found a 5" diameter tank, I think the entire thing would have fit into that recess.

Here's a low-angle shot of the brackets test-fit.
 And here's a shot level with the bottom of the van body. Can you see it? Nope, it all tucks up into that space really nicely, so very little risk of damage there.
Can I also just say: What a delight working under a lifted van! So easy to just slide under there for test-fittings and installation. No jacks, no ramps, just a single jack-stand to help hold the tank while I do up the bolts.
 Brackets finished welded and primed. I'll finish the paint this week, and I hope to be able to get the tank and compressor mounted sometime after Thanksgiving (though I hope to head out to do some hiking on Black Friday). It's looking like the compressor will get mounted in the rear near the spare-tire mount, there's an out-of-the-way spot up there.
Stay tuned for more!
Ergo, time to simplify that as much as possible. Hard-mounting the compressor and an air tank under the van won't shorten the actual time to re-inflate by very much (though having a bit of reserve in the tank should help a bit). The biggest motivator here is just to have everything "ready to use" as much as possible. Connect the coiled hose to an outlet on either side, and start the air. When complete, disconnect and stow the hose, and off I go.
To that end, I did my usual "slow burn" on this project. I spent a few months gathering datasheets and crawling around the van with a measuring tape. A few months back, I picked up a hard-mount version of my Viair 400-series compressor from a friend at a swap-meet. Next I scored a nice air tank off eBay for about half of normal price. Today's project is to get ready to mount the tank.


Here's a low-angle shot of the brackets test-fit.

Can I also just say: What a delight working under a lifted van! So easy to just slide under there for test-fittings and installation. No jacks, no ramps, just a single jack-stand to help hold the tank while I do up the bolts.

Stay tuned for more!
Tuesday, October 17, 2017
Retro Post: Solar System Installation
Some questions on solar systems have been coming up on the GTRV owner's forum lately, and while I've been popping in with options and opinions, I haven't had a firm write-up I could point people to. Time to remedy that by detailing some of the important bits of the Astrolander's solar installation.

Subscribe to:
Posts (Atom)